How to lay parquet?
Installation of the parquet floor:
Most parquet manufacturers include installation instructions with the parquet assortment. The following steps explain the basic procedure. In principle, the manufacturer's installation instructions should always be followed.
The direction of laying
If possible, the direction of laying should be in the direction of the windows or the incidence of light. However, the laying can be done in any direction. Parquet can be laid diagonally or with transition profiles in a wide variety of directions. With normal laying is purchased about 5 percent more that is calculated for the offcut. And in the case of diagonal laying, the waste increases by 10 percent. If the subfloor consists of a plank floor, the parquet elements should be laid across the longitudinal direction of the plank. The recommended impact sound insulation of the parquet manufacturer should be observed.
Tools
Saw (jigsaw or circular saw), drill (for the skirting boards), hammer, pull iron, tapping block, spacer wedges, putty knife, glue, folding rule, angle, pencil, adhesive tape, cutter knife.
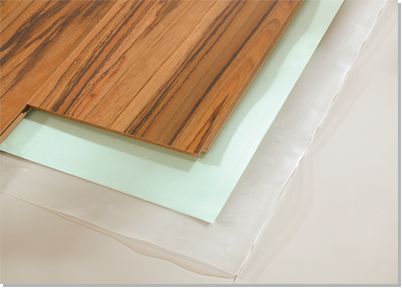
Material
Laminate, PE foil, impact sound elements, skirting board, transition profile for door transitions, spacers, possibly heating pipe cover. In the case of laminates with integrated impact sound, the impact sound elements are of course omitted. A combination foil can also be used, whereby the impact sound elements are connected to the PE foil. Laminates with clic or loc systems are laid floating, i.e. without connecting the panels to the subfloor. This makes it easier to take up the floor again in case of a possible move, repair or renovation.
Preliminary work
Determine the size of the room, where length times width gives the square amount of laminate, to which is added about 5% offcut. If the laminate is laid on a mineral substrate (concrete, screed, asphalt), a PE film is also needed as a vapor barrier to control rising damp. In addition, the impact sound insulation elements, which can also be a combination film, which has both integrated. When laying laminate on wooden floors, wooden floorboards, etc., the PE film is unnecessary.
The delivered laminate flooring was stored in sealed packages for 48 hours in the room where it will be laid. The residual moisture contained in it has adapted to the environment, thus preventing the formation of joints due to excessive contraction or swelling of the panels. The laminates are freed from their packaging and in good light the panels can be sorted according to color gradations or the course of the grain.
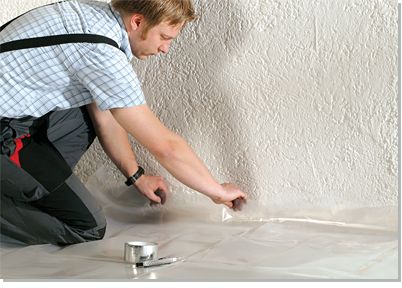
Now the first sheet of PE film is laid out. Since it should protrude about 10 cm on the sides of the wall, it is pulled up the wall and fixed with adhesive tape. This is followed by the impact sound insulation, which is applied to the vapor barrier film. If the laminate has an integrated impact sound insulation, this is unnecessary, and, of course, with a combination film.
What to consider when laying parquet:
The vapor barrier
Mineral substrates such as screed, asphalt, concrete, for example, require a so-called vapor barrier to prevent the penetration of moisture from the substrate, into the parquet floor. For this purpose, plastic films such as PE film or polyethylene are used. Here, too, there are differences in terms of impermeability and permeability, the vapor permeability is specified as sd value.
These films are laid in sheets and fixed with adhesive tape. They must be laid only on mineral substrates such as screed, concrete, asphalt, for example, this is particularly important in rooms without basements and new buildings. However, even if these mineral substrates have been heated in the home for several decades, it is generally necessary to install a vapor barrier, since under certain climatic conditions water vapor can condense in the floor area as condensation and cause structural damage. The vapor barrier is laid in the form of a trough. The sheets are laid side by side, overlapping by about 20 centimeters and fixed with adhesive tape. In the case of wooden subfloors, no vapor barrier may be laid in order to ensure the natural circulation of moisture.
The impact sound insulation
For impact sound insulation are particularly suitable felt sheets, foam boards, cork mats, which intercept and absorb the sound that occurs when walking on the parquet floor. When laying parquet on underfloor heating, when choosing the impact sound insulation, pay attention to the thermal resistance, so as not to reduce the effectiveness of underfloor heating. The thermal resistance (WDW) of a material determines the degree of insulating effect. The higher the value, the more insulating the material is. Therefore, the value should be low and not exceed 0.15 sq.m K/W to achieve good thermal transmittance and allow the underfloor heating system to operate economically. Thermal resistance depends on the thickness and density of the material. According to the manufacturer, parquet has a value of 0.05 to 0.10 sqm K/W. To this is added the value of the impact sound to be used, as well as the value of the vapor barrier. Not to forget then the insulating effect of the air cushion between the individual materials, which can not be calculated exactly, but should be taken into account. It is recommended to glue the floor over the entire surface to avoid an air insulating layer between the substrate and parquet.
The subfloor
Suitable subfloors for parquet flooring are screed, concrete, asphalt, chipboard structures, wooden floorboards, hard coverings such as PVC, stone, ceramics. The condition of the subfloor should be aligned so that the parquet floor can be installed according to the manufacturer's installation instructions. The subfloor should be level. Differences of more than three millimeters in the subfloor must be sanded or filled. To determine these unevennesses use a spirit level or a straightedge. The subfloor must be firm to walk on and must not spring. Thus, carpeting is not suitable as a substrate and must be removed before installation. This is because the carpet, which lies under the parquet floor, causes a springy movement when the parquet surface is walked on and strong pressure in the edge area. This would destroy the tongue and groove joint or clic joint and lead to the formation of gaps. Likewise, for hygienic reasons (mold, odor), the carpet should be removed before laying the parquet. The subfloor must be absolutely flat, clean and solid. Even if impact sound insulation were to be laid on top of the carpet, this problem would not be solved. The subfloor must not bounce or buckle under load, but must be absolutely sound before the parquet can be installed. Thus, carpeting under a hardwood floor should generally be removed.
Walkability
Since parquet flooring does not require any oils or sealants, as is the case with various types of wood flooring, it can be walked on immediately after installation. Also, first half of a room can be laid with parquet flooring and the appropriate furniture can be placed back on it, and then the other half of the room can be further laid with parquet.
The wall spacing
Attention should be paid to the wall spacing, the expansion joints are fixed with spacer wedges, so that the parquet floor gets space and can 'work' accordingly like all wooden floors. The term 'work' refers to the swelling and shrinkage processes of the wood or wood-based material caused by the natural hygroscopic behavior, the absorption and release of moisture. In addition, the dimensional behavior of parquet flooring elements is affected by heat or cold acting from above or below. Therefore, it is important that the parquet floor has room to work in order to avoid possible damage later. These damages can be: open joints, swelling, compression in the joint area with decorative damage, standing up of the floor (waves). The distance between the parquet floor and the wall and all fixed components, should be 1.2 cm to 1.5 cm and is determined during installation with spacer wedges. Expansion joints should also be taken into account when laying parquet, especially if the area to be laid is more than eight meters in the longitudinal direction or width, and if laying across rooms is planned.
Laying parquet
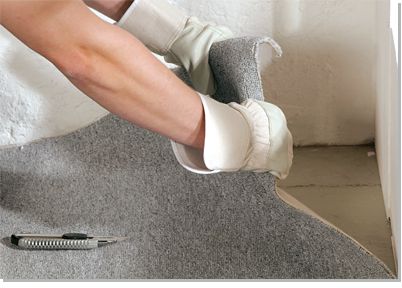
Removal of the old subfloor
Lay out vapour barrier
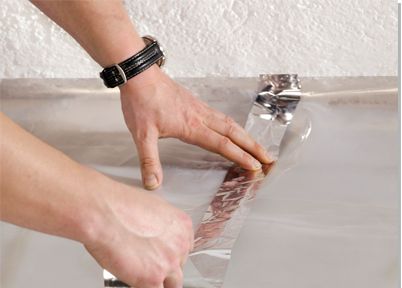
Bonding the vapour barrier
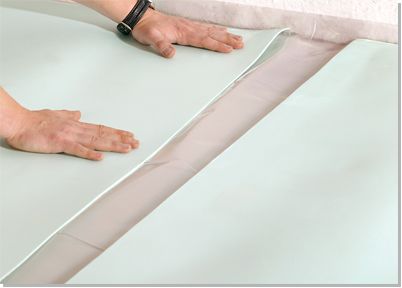
Lay insulation underlay to reduce the impact sound
Overall structure in the profile view
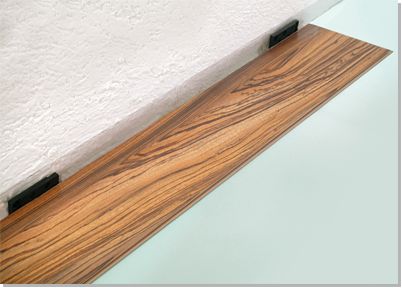
Fix the spacers to the wall and lay the first row
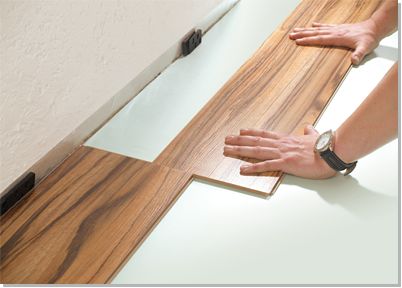
Continue the second row with the simple click system
Simply press down until the spring clicks into place.
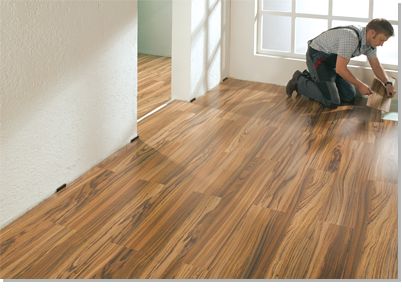
Ready to lay the floor
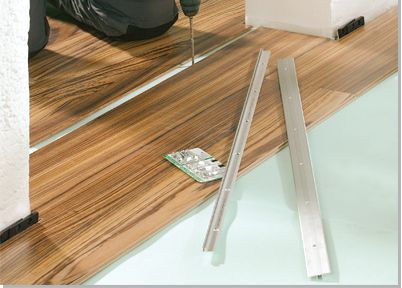
Quickly install the skirting boards, distance the
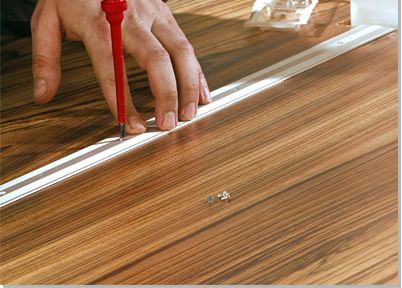
Mark the fastening clips.
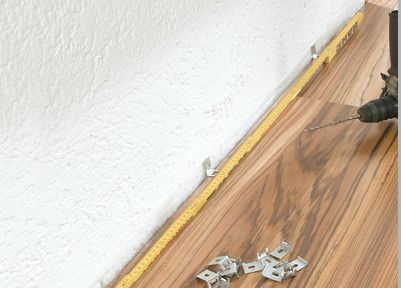
Pre-drill the fixing clips:
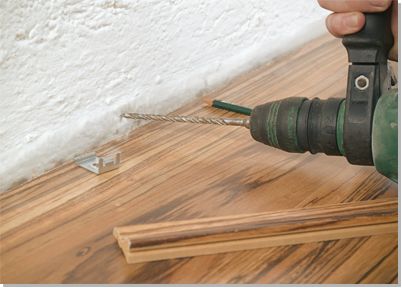
Fitting skirting boards
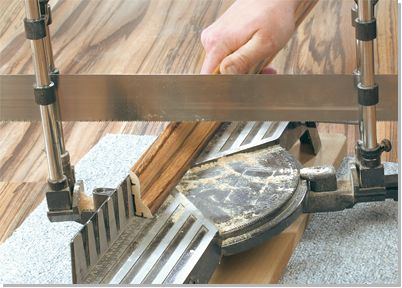
Mitre cut in the corners
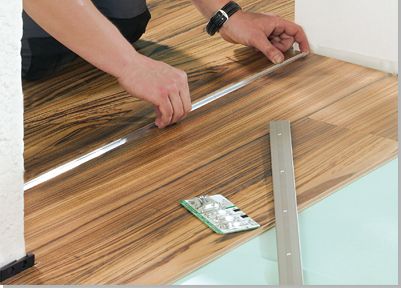
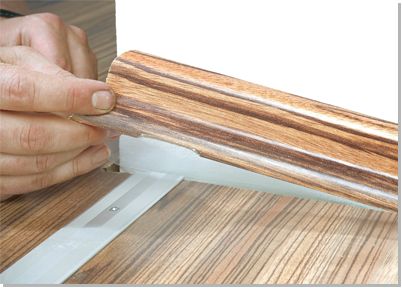
Measure and insert transition profile
Fitting the transition profile cover strip
Fixing skirting boards in the room passageway
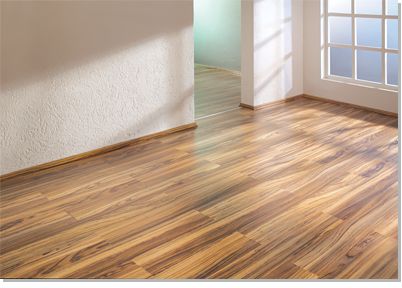
Ready!
A quick dusting
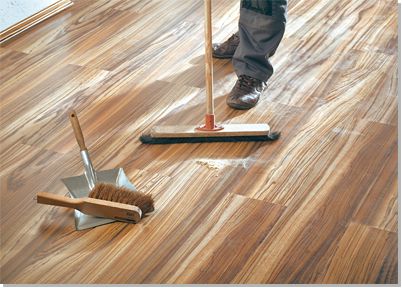
Now quickly wipe once damp with parquet care
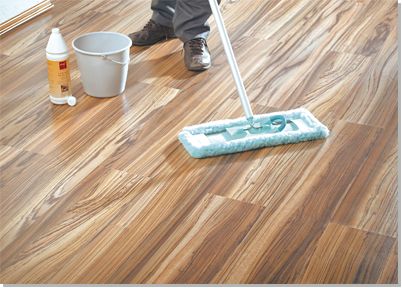
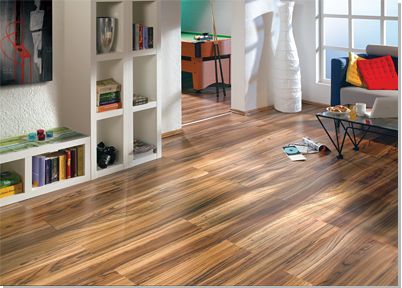
Perfect, the new floor lies
Written installation instructions parquet for ship floor- maxistab and country house floorboards format
The adventure of laying parquet begins. The preparations are right, the laying direction has been set and we start in the left corner.
- The first row of panels is laid against the wall. This is done by applying firm pressure with a mallet or a pull iron, which is used to join the panels together at the head ends. In most cases, the last panel must be cut.
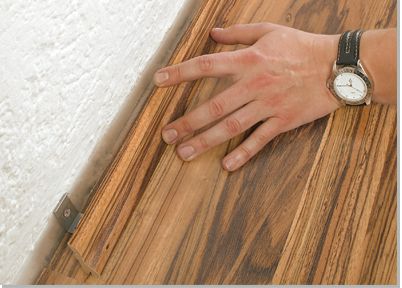
- This last panel is placed against the laid row and pushed up to the wall.
- The protruding part is marked.
- Place the protractor on the panels and draw a line with the pencil. The distance from the wall does not need to be taken into account here, as the required distance from the wall is obtained by placing the panel against the groove.
- Cut off cleanly, lay it down, the first row is ready.
- Fit the spacer between the wall and the panel.
- If it is now found that the wall course is not straight, the panel must be adjusted.
- The wall unevenness is transferred to the panels and the jigsaw is used to adjust the row of planks to the course of the wall. To ensure a clean cut, always cut from below.
- Allow the jigsaw to run at full speed until the full speed is reached and only then cut to size so that the parquet does not tear at the cutting point. The leftover piece is used as the first element for the second row, but this panel should be at least 30 cm long and not smaller, so that the joint offset of the individual rows is about 40 cm.
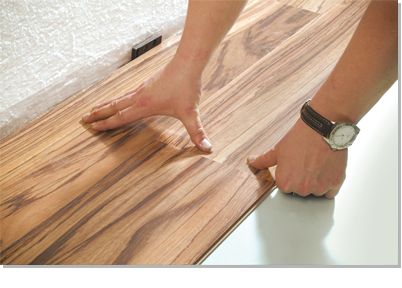
- The panel is placed on the groove of the first course from above and carefully tapped and wedged from behind.
- The spacer is placed at the beginning of the row of planks to create the necessary expansion joint between the wall and the parquet. This row is laid out and at the end proceed in the same way as in the first row of panels, add the final panel, create and mark the angle, saw off.
There are two ways to connect the individual panels:
- the first variant is to join the end panels, at the same time inserting the panel into the groove of the row that is already in place
the second variant would be
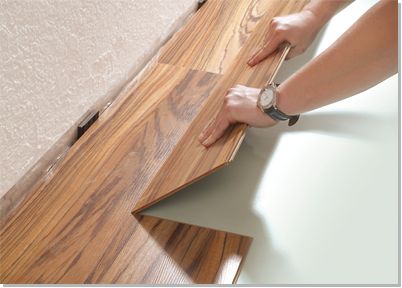
- first connect the headers of the panels until the row is complete
- Now the tongue side of the panels lies completely on the groove of the first track, the row is lifted and inserted into the groove from the side. When lowering, the click connection locks into place.
- In the same way as described in the first or the second variant, the other rows are laid.
- After that, the second PE film is laid, if no factory gluing is applied, the first is overlapped with about 20 cm and glued together with the aluminum tape along the entire length and, of course, the impact sound insulation, if no combination film is used or the parquet to be laid does not have integrated impact sound.
- The last strip is laid.
As a rule, this last strip must be cut to size, as it is probably extremely rare that the room size matches the panel dimensions, and this is how it is done:
- The panel is laid out and turned 180 degrees, that is, with the groove side pushed to the wall and marked accordingly on the back, create angle and draw a straight line, cut off accordingly.
- The other option would be to measure the distance and transfer it to the wood side, ie back of the panels.
- The cut panels are inserted.
Click method
enables quick installation of parquet elements without glue. By tilting or turning the parquet elements they snap into place or are inserted into each other in the laying plane. The process of laying these parquet elements is exactly the same as gluing in tongue and groove.
The parquet floor is usually laid floating. This means that the floor is not fixed to the subfloor. Due to the installation method with click connections, parquet flooring is easy to install, as well as prefabricated parquet. The panels are put together and snap into each other, no glue is needed. The advantage of these click systems is not only a problem-free installation, but also the simple removal of the parquet floor, for example, when moving and a corresponding new installation of the parquet floor is possible. Also, the formation of gaps is prevented, because due to the precise fit profiling of the panels, the tongue can not slide out of the groove.